Monday, 15 October 2012

Project Number Two- Doors

Well as busy as Dave has been building floats and ramps, he still found time to surprise me by installing some doors for me while I was at work. I absolutely love the new doors. The front door had been added in the last few years and didn't match the look of the house at all. Here is the before picture, blech!!


Here is the new door, yeah! The style and colour suit the house much better and the window is a godsend. This was another Craigslist find. I kind of like the natural wear and tear marks on it as it makes it look like it has been on the house for years.
 
 
It adds so much more light in the kitchen now and greatly improves the view.
 

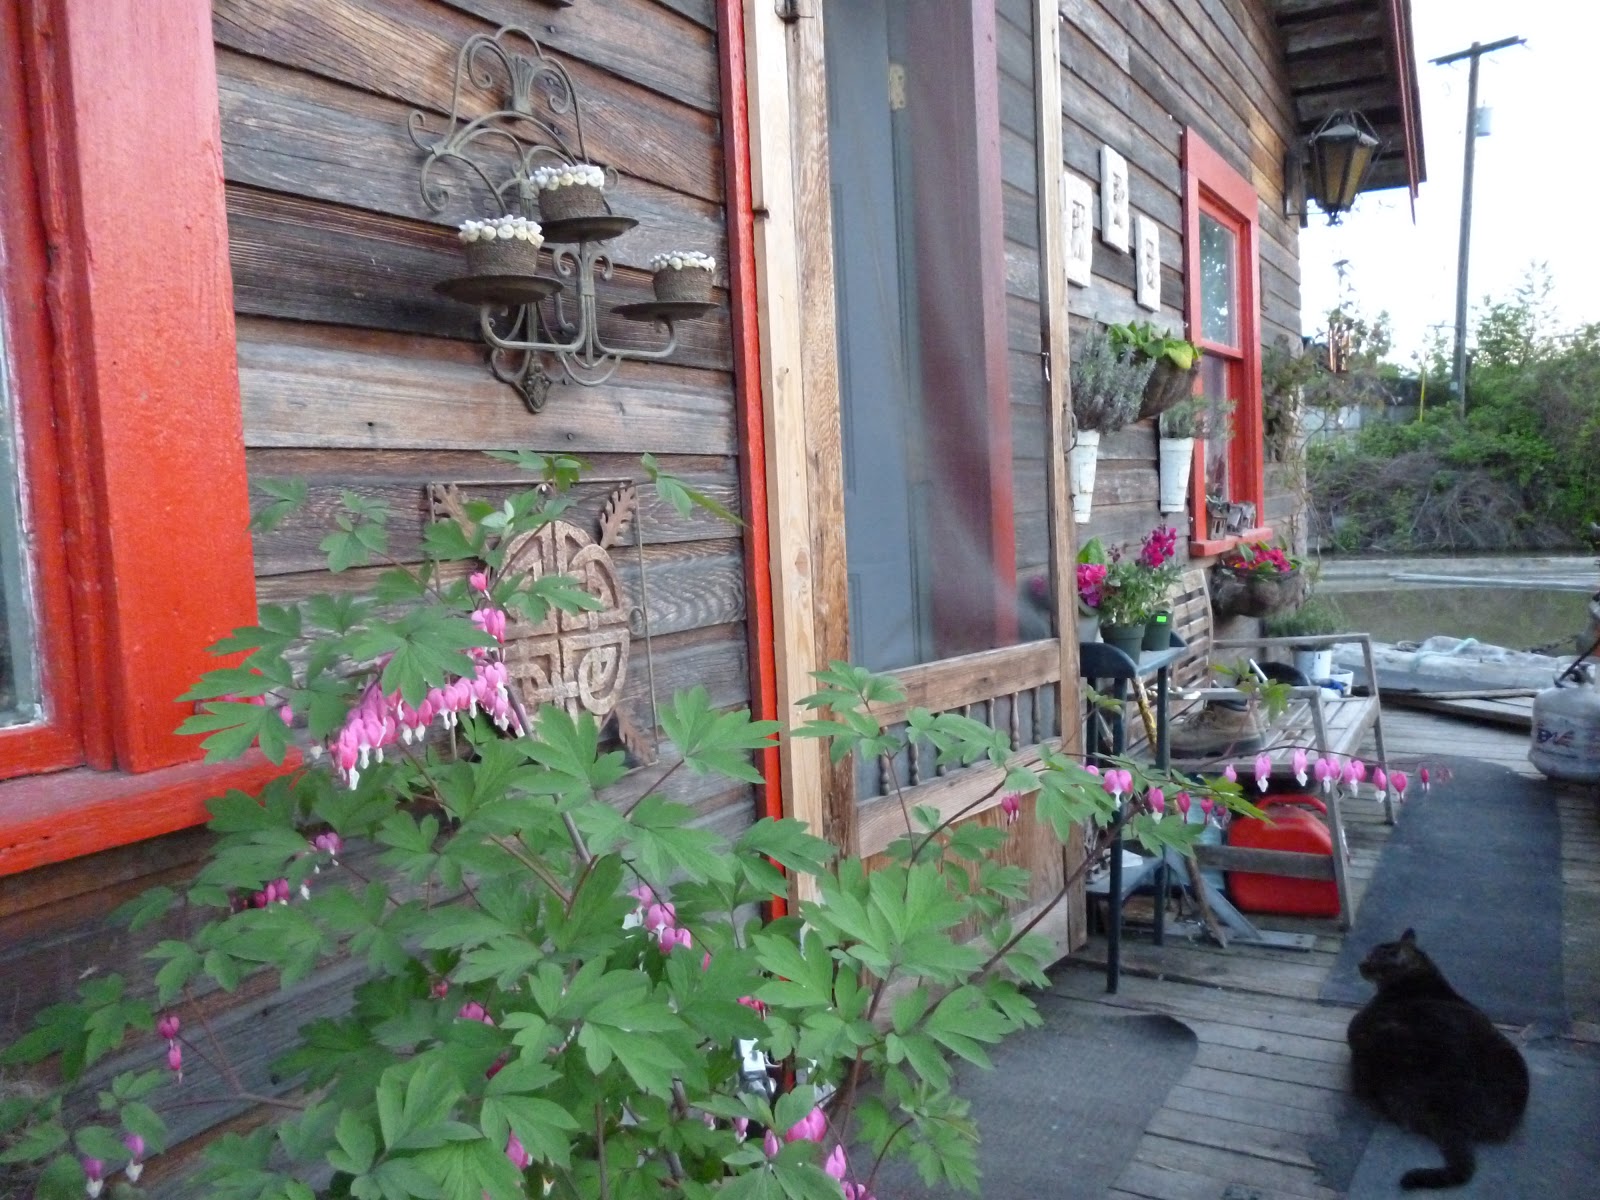
I found this screen door in an alley and was so excited. I have always wanted a wooden screen door, complete with squeaky hinges, and now I have one!
 
The biggest surprise of all though was when I came home to find the stain glass patio doors installed.
The large sliding door that was there is just pushed open and the patio doors framed in the opening. We can still close the sliding door for extra protection if needed.


How pretty is that! Can you believe I got these for free on Craigslist? I love them to pieces. Someday we will find some cedar tongue and groove to finish off the edges on the outside so it matches the rest of the house. Right now I am just so grateful for the extra light in the living room.


At some point we plan to repaint the trim on the house, when we do, the white doors will get painted to match


I wrote a post last year about some different doors that inspired me. Here are a few more doors in my house that I like.


This is the door to my bedroom

This is one of two doors that I refurbished to fit the doorways in the kitchen. I love these doors so much. Again, I got them for free on Craigslist. They were originally a set of sliding doors that I changed to take a regular door handle.

This is one of two sliding doors that were installed in the bathroom. This one opens into the room on the other side which someday will be a massage room.

I saved the oval door that lead to the bathroom on my old boat.

One of these days that door will be installed in this opening which I had cut into the wall to provide another doorway into the other upstairs bedroom\

Well I am loving all my new- to- me doors. I don't know where Dave finds all the time to get all this stuff done but it is so great to finally get moving forward on the Reno's!

Did you like this post? Share it! Tweet it! "Like" The Eclectic Ark on Facebook! Thanks, your awesome,

Sunday, 14 October 2012

Project Number One- A New Ramp


It seems that one of the issues that has plagued us most while living on the water is safe access. This is what we were dealing with at the last location. The large boom sticks in this picture were attached to the shore and were holding in the marina just to the left of the house. As we couldn't just run a dock straight from the land to the house, we had to have many  disjointed sections to cross over the sticks. Every single time the tide changed, these sections would float around and change shape, often falling apart. Dave had to rearrange things every single day, so that we could have passage to shore.
 
 
Note the board in the middle is about 2 feet above the dock in front of it. At low tide we had to step on one end of the board, walk to the middle of it and wait for gravity to lower the far end like a teeter-totter so we could continue on. I work nights, usually getting home around 10-11 pm.Trying to navigate this in the rain and in the dark was always terrifying.


One day the river took the main dock and twisted it so hard that even Super Dave couldn't get me out.
Needless to say,we are so happy to be finished with that place.
 
So after our experience on Mitchell Island, this setup looked positively awesome, although in reality it left a lot to be desired as well.


The boards are laying across an extremely old rotted dock that shivers and quakes as you pass over it.


The landlord had purchased these old crane sections.
 
 
Dave spent several days cutting all the cross bars off the top end of them.
 
Here is some of his hard work, these bars will be recycled by bending them into U shapes which will then be fitted around the pilings and used to attach the docks more securely.
 
With the upper bars cut out, these will now make a nice walkway for us with good high railings.
 
The sections were all pinned together and lifted into place with a crane.
 
We are just waiting for the landlord to purchase some expanded metal mesh like this so Dave can finish decking the ramp
 
 
Here is a good shot showing the new ramp next to the old one. Believe it or not, the water was as high as the new ramp last spring when there was much flooding in the area during the freshet.


All that hard work paid off, Dave is a happy camper now!
How lucky am I to have such a handy boyfriend!!

Dave also built the float that the ramp is resting on. It's not quite finished yet in this picture. There are still rails to be bolted in place around the edges and steel rails for the ramp wheels to rest in that have to be installed.


The float was built from an existing dock, which was cut in half, joined together to make it wider and new sides and decking put on. The decking came from this old dock. Dave had to go and pry off the boards he needed and cut them to size and install them.


The result: a beautiful new float for the ramp!


With winter nipping at our heels, it will be great to have the new ramp to use. The expanded metal will give us lots of traction without holding snow. Dave just spent this morning nailing down a roll of gritty tar paper on the long dock beside the house, so we should be very safe and comfortable getting on and off the water. Now that this job is done, hopefully the next item will be bringing in some power! That will be the happiest day of my life!

Did you like this post? Share it! Tweet it! "Like" The Eclectic Ark on Facebook! Thanks, your awesome,

The Ark Gets an Olive Branch


Well it's been a long, hard journey but the Ark has finally found permanent moorage ! I am still pinching myself with disbelief that not only have I found a safe haven for my home but it is everything I have ever dreamt of.

                                                      The Ark in her new location
 

My entire life has been a quest for a sanctuary that I could retreat to at the end of the day, a place that would nourish me, protect me, inspire me.

Don't get me wrong,  I have had an awesome, interesting life. Ive lived all over the world, in all kinds of circumstances. I wouldn't take any of it back ( well maybe a few parts...) but the piece that was always missing for me, was having a home of my own. Acquiring the Ark was the first part of realising my dream, finding somewhere to moor it was the second.

I knew in my heart that the marina where I had the Ark wasn't ideal in so many ways, but at the time it was easy and reasonably close to work. I had hoped to stay there for five years so I could finish all the renovations and then I would look around to see if I could find a prettier location to moor it.

Unfortunately, the powers-that-be, decided that I had to move much sooner than that. The Port Authority pressured the landlord to get rid of his liveabords. He in turn, cut off my power and water, hired a thug to terrorise us, and made false accusations to the police in an effort to get rid of us. It was  not that I didn`t want to go, just that I couldn't find anywhere to go. One of the biggest obstacles was the size of the Ark. Most float home communities have fairly small berth sizes like 20x20 or 20x30 for example while the Ark measures in at a colossal 28x66 feet.

I thought I had solved the problem when I entered into a discussion with the City of Richmond to donate the Ark ( a historic net shed) to their maritime museum in return for being able to stay in it as a caretaker. Things were looking good and I really thought I was going to be moving to Steveston. However, after six months of city hall meetings, they came back to me and said,`` they liked the house and wanted to add it to their collection but did not want anyone living in it and had no money to buy it from me``.  That left me back at square one.

I was heart broken as, at the time, I really believed that was the best place for me. My business, which is thriving, is in Steveston and I love the village. I love that it is on the oceans`edge, that there are lots of places to exercise and that it is quaint and historically preserved. I couldn't imagine a better place. I was wrong!

I spent months door-knocking on my days off. We spent many days driving up and down the Fraser River asking people if we could dock in their back yard. Finally we were offered an olive branch. We met a wonderful couple who sympathised with our plight and decided to let us moor at their dock.

Their place was about 60 km up river from where we had been moored. We entered into an agreement in June but because of the freshet, ( the swelling of the river from winter snow melt) we had to wait until September before it was safe to move the house.

Finally moving day was upon us. I have to say, this was the easiest move of my life. Usually there are weeks of packing involved but this time all I had to do was take down a few breakables and place them on the floor in case we hit big wake.

 Sadly for me, I had dislocated a rib a few days before and so stayed behind in Vancouver to go to a Chiropractor appointment, run some errands and drive the car to the new location. I missed getting towed 60 km up river on a beautiful summer day. From the photos that Dave and a friend Rick took, the trip was absolutely gorgeous. The most important thing for me though, was that all went smoothly and safely which thankfully it did.

We have been here for about a month now and I couldn't be happier. The river is very wide here, almost two km which makes it feel more like a lake than a river. We went from having hundreds of condos staring at us from a few hundred feet to feeling like we live in the middle of the wilderness. The views are beautiful and inspiring and I doubt I will ever tire of them. The countryside is picture perfect cuteness and a joy to explore. Fields of horses graze contentedly, babbling brooks meander through forest and fields and the nearest town looks like a movie set.

                                          The view from my bedroom before


                                                         The view from my bedroom after

 
The view across the river before


                                                          The view across the river after


The view from the back of the house before ( not so bad really), but compared to....


                           The view of from the back of the house after ... no contest :)


I have come to terms with the two hour commute for work. I love where I live and I love where I work. Arriving at either end brings me much joy, the commute is a small price to pay for being a part of two of BCs most historic and beautiful towns.

Now that the drama of finding a place to live has been dealt with, we will be getting on with the renovations. We still don't have power or water, but that is coming all in good time. We haved lived without them for a year and a half now so a few more weeks is tolerable. We have gotten a lot accomplished already, so stayed tuned for more posts as we get on with creating our dream home.

The Ark in her element, at one with nature and continuing to be a part of the history of the mighty Fraser River! I thank the universe for providing such an oasis and for letting me live my dream.xoxo

 
Did you like this post? Share it! Tweet it! "Like" The Eclectic Ark on Facebook! Thanks, your awesome,

Sharing this post with My Romantic Home show and tell

Thursday, 12 April 2012

East is East- Where Taste Buds go to Party!


I live in Vancouver BC, which is a very multi-cultural city. The best part of that is, the tremendous variety of food available here. I have come to love, no... crave sushi, even having it for breakfast! Or nothing better than a delicious green coconut Thai Curry served on a bed of fragrant jasmine rice. A Vietnamese Pho soup makes a lovely lunch, and a Chinese Hot Pot is a great way to share food with friends. However, I must say, that of all the wonderful culinary delights this city has to offer, I have never been able to develop a liking for East Indian food... until now! I discovered an amazing restaurant called East is East and the Chai Gallery and now I am hooked.

The decor is reminiscent of an Arabian tent, with lush Persian carpets lining the floor and walls. The furniture is roughly crafted from raw wood. Candles flicker softly, creating a sensuous mood highlighted by exotic music playing softly in the background. If your lucky, live entertainment including belly dancers and talented musicians will accompany your meal.


The food is a marvellous fusion of Indian and Afghan food with fragrant rice and delicious roti bread to soak up tasty curry dishes and dahl (lentil) soup


They specialise in yummy Chai teas and they tease you with free little cups of Chai to taste. They are all awesome! I am hooked on Chai now! So much so, that I decided to learn how to make my own. Some of my clients are from India so I asked them how they do it. I then googled some more recipes and have come to realise that there are lots of different ways to make Chai and best that you experiment until you find your perfect blend.


So here are some recipes and information regarding Chai that I found. If you haven`t tried this tasty drink yet, I would urge you to try it. I was hesitant at first because it contains black tea which I have never liked the taste of, but you can`t taste it at all in this drink. The fragrant spices and large dose of milk and sugar make this taste more like a hot chocolate infused with pumpkin pie spices.

Chai tea is a unique and wonderful sweetened and spiced creamy milk tea. A more accurate name for it is Masala Chai, masala meaning spiced and chai meaning tea.
Recipe for chai tea in a jar, ginger root and tea strainer homemade gift basket...One thing that makes this chai tea recipe different from others, is the use of crystallised ginger instead of powdered or fresh.
Still, for a spicier chai tea with even more ginger taste, you can add some fresh ginger to the mix.

When purchasing these spices, you can find them in the bulk section of most health food stores and well stocked supermarkets. You'll get the best prices by buying in bulk and you don't have to invest in a huge amount of any given spice. You should also be able to find the loose leaf tea and crystallised ginger in bulk.
Whole cinnamon sticks, peppercorns, cloves, loose leaf black tea plus a pinch of nutmeg for chai tea recipe...
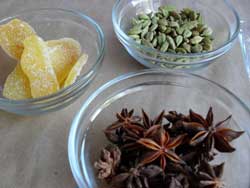
Crystallized ginger, whole cardamom pods and star anise for chai tea mix...

Here's What You'll Need For This Whole Spice Chai Tea Mix


  • 3 teaspoons premium loose leaf black tea such as Darjeeling  
  • 1 two inch cinnamon stick
  • 1 four to six inch vanilla bean cut in 2 inch pieces
  • 2 whole star anise
  • 8 - 10 cardamom pods or 1 teaspoon ground cardamom
  • 8 whole cloves
  • 3 whole black peppercorns
  • 1/8 teaspoon nutmeg
  • 2 inch slice of crystallised ginger
  • Optional to go with mix: 1 inch or larger nub of fresh ginger root with peel (choose ginger root that is plump and juicy not wrinkled)

To Make this a Gift Mix in a Jar: Using a glass spice jar or cellophane bag, add tea, spices and ginger in the order given above. Secure air tight lid and decorated as desired. Include a gift tag with directions for making the chai tea (see below). Optionally, you may choose to include a list of the ingredients in the jar so the recipient can make it for themselves again. If desired, give the spice jar with any or all of the following - a small strainer, coffee mug or tea cup, tea kettle and/or fresh ginger root.
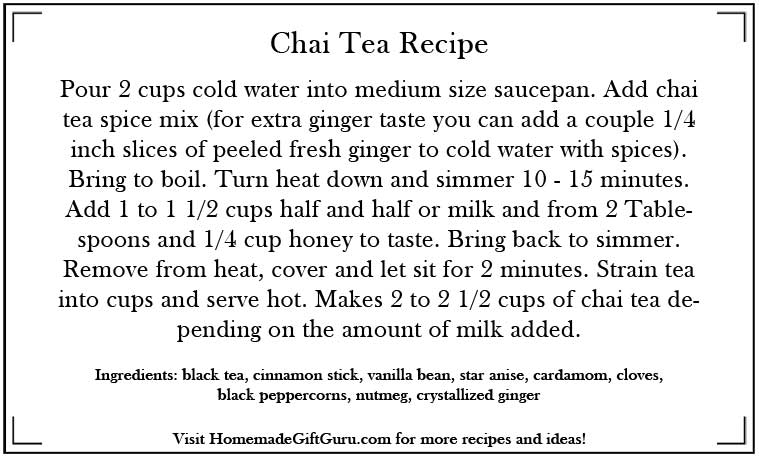
Homemade Recipe Tag - or Print Recipe Gift Tag Here


How to Make Chai Tea Recipe Gift Tag Instructions:
Pour 2 cups cold water into medium size saucepan. Add chai tea spice mix (if using fresh ginger in addition to crystallised, add at least two 1/4 inch slices of peeled fresh ginger to cold water with the spices). Bring to boil. Turn heat down and simmer 10 - 15 minutes. Add 1 to 1 1/2 cups half and half or milk( you can also substitute coconut milk, almond milk, or soy milk for a different flavor) and from 2 Tablespoons to 1/4 cup honey(or brown sugar) to taste. Bring back to simmer. Remove from heat, cover and let sit for 2 minutes. Strain tea into cups and serve hot. Makes 2 to 2 1/2 cups of chai tea depending on the amount of milk added.

                              The secret of Indian-style tea 

The best way to get the distinct flavor of Indian tea is:
- take the tea bag or loose tea (preferably Darjeeling or Assamese) and put it in the water while it's cold (yes, cold).
- then boil the water with the tea bag in it.
- once it's boiling add 1-2 spoons of sugar and about 1/4 cup of milk ( or add quantity to taste)
- if you like the taste add Indian Masala when water starts boiling

- then strain and serve.
You'll find that the taste of any tea bag is better when it boils instead of adding boiled water into a tea cup with a tea bag because the tea really "infuses" when you boil the bag with the water.

*While looking at recipes, I came across this one. It`s not a Chai Tea as it has no tea in it  but it sounds like it would be delicious and I plan to try it soon!

Arvinda’s Saffron Scented Almond Chai Spiced Milk ~ Kesar Badam Doodh
Ingredients:
2 cup milk
¼ cup ground almonds
1 tsp. Arvinda’s Chai Masala ( or use the spices listed in the Chai recipe above)
4-6 strands saffron
1 tbsp. jaggery or raw cane sugar or honey
Method: In a medium saucepan, bring milk to a boil with almond, Arvinda’s Chai Masala, saffron strands. Sweeten with raw cane sugar, honey or jaggery. Serves 2.

My absolute favorite part of my meal at East is East is one of their deserts called Eastern Ecstasy. I have been known to stop by there just for this desert!! I love it so much, I decided to try and recreate it at home. I am lucky that with such a large East Indian population here, the ingredients are not hard to find. I was able to get everything I needed at a store called Fruiticana on No.5 Road and Cambie in Richmond BC.


The desert consists of warm rice pudding( Kheer) with something called Gulab Jamun ( a sweet sticky bun) warmed and served with vanilla ice cream topped with crushed pistachios, rose water and cardamom. The temperatures of the hot and cold, the sweet tastes of rose water and vanilla ice cream, the addictive flavors of cardamom and pistachio combine to make this a party in your mouth!! At Fruiticana you can buy the Kheer and Gulub Jamun in the freezer section and then it`s just a matter of assembling it all at home. For those that can`t buy them ready made, here are the recipes.

Kheer - Payasam - Payas - Rice Pudding
This creamy rice pudding is delicately flavoured with cardamom and full of nuts. It's a great dessert for anytime of the year. In south and east India versions of it are made for certain festivals. In the South, Kheer is called Payasam and in the east it is known as Payesh.

Ingredients:

  • 2 litres full-cream milk
  • 1 can (400 gms) sweetened condensed milk
  • 1 tsp cardamom powder
  • 1 cup sugar
  • 1 cup Basmati rice
  • 50 gms almonds blanched and slivered
  • 50 gms raisins
  • A few strands of saffron
  • Rose petals to garnish (optional)

Preparation:

  • Wash the rice well and soak for half an hour in enough water to cover it fully.
  • Put the milk, condensed milk and sugar in a deep, thick-bottomed pan and boil. When the milk comes to a boil, add the rice and simmer. Cook till the milk thickens and reduces to half its original volume.
  • Add the almonds, raisins and cardamom and cook for 5 more minutes.
  • Turn off the fire and add the saffron. Stir well.
  • Allow the kheer to cool, then chill.
  • Serve cold garnished with rose petals. ( I heated mine in the microwave just before serving with the ice cream, I layered it on the bottom of the dish, then put a warm Gulab Jamon in the centre, surrounded by three scoops of ice cream, drizzled the whole thing with a few teaspoons of rose water and topped with crushed pistachio`s and a light dusting of cardamom powder)

How to Make Gulab Jamun                    Video How to

Gulab Jamun is among India's most popular desserts! This delicious dessert consists of dumplings traditionally made of thickened or reduced milk, soaked in rose flavoured sugar syrup.
It gets its name from two words: Gulab which means rose (for the rose flavoured syrup) and Jamun which is a kind of deep purple coloured Indian berry (the cooked dumplings are dark brown in colour). Serve Gulab Jamun warm or at room temperature; by itself or topped with ice cream!

Gulab Jamun Ingredients:

  • 3 cups sugar
  • 6 cups water
  • 1 tbsp cardamom powder
  • 2 tbsps rose water
  • 3 cups powdered milk
  • 1 1/2 cups all purpose flour
  • 1 1/2 tsp baking powder
  • 1 cup thickened/ heavy/ double cream
  • Vegetable/ canola/ sunflower oil for deep frying

Mix the Gulab Jamun Batter

Mix the water and sugar in a deep pan and boil till all the sugar is dissolved. Turn off the flame and add the cardamom powder and rose water. Mix well and keep aside. Mix the powdered milk, all purpose flour and baking powder well. Add a little of the thickened cream at a time to them and knead to make a dough that is soft but not sticky.

Fry the Gulab Jamun Batter

Divide the dough into walnut sized balls and roll between slightly greased palms till smooth. Heat the oil for deep frying in a wide pan on a low to medium flame. Fry the dumplings, stirring often to brown on all sides. Do not cook on very high heat as the dumplings will burn on the outside and remain raw inside! When cooked, drain (with a slotted spoon), remove the dumplings from the oil and transfer immediately into the sugar syrup.
Repeat this till all the dumplings are cooked and added to the syrup. Allow the dumplings to soak in the syrup for 2 hours. Some serving suggestions: Warm gulab jamuns with ice cream; gulab jamuns with thick cream; gulab jamuns garnished with shavings of dried nuts like pistachio and almond.

While looking for these recipes I stumbled onto this site which I have bookmarked for future reference.
All Indian Recipes - there are some amazing looking recipes here. I am going to start in the drink section with this one for a delicious sounding fruity drink

Bon appetit!

Did you like this post? Share it! Tweet it! "Like" The Eclectic Ark on Facebook! Thanks, your awesome,

The Eclectic Ark